About Prints

What is a print? / How is a print made? / Types of Prints / Editions & Proofs

What is a Print?

Heather Page wiping an etching plate with a ball of tarletan

We make prints by transferring a substance (ink, paint, pencil…) from one surface to another. Think of a thumbprint. You push your thumb on an ink pad, then press it on a piece of paper. That’s a relief print!

There are four main ways in which we transfer ink: intaglio, lithography, relief, and stencils.  Most prints start with an image or text that we carve, draw, paint, or transfer onto a plate, stone, or screen (the print matrix).

To make a print, we…

  1. Ink the matrix
  2. Align the printing paper (or fabric, or fur, etc.) to the matrix
  3. Press the matrix and paper together by hand or with a press. This transfers the ink to the paper

Each kind of printmaking can make more than one print. Some processes create just a few good prints before the matrix degrades. Some can be used to print hundreds of prints. So, the number of prints in an edition (group of prints) depends on which processes and presses the printer uses as well as how many prints the artist wants to make.

What we printmakers want you to know is that we make artistic decisions at every step of the printing process. That’s why we call our prints “original prints” or “handmade prints” in an effort to distinguish our work from “limited edition prints”.  Limited edition prints are reproductions of artworks usually made in other medias. How can you tell which is which? Ask for the print documentation. Or just start talking with the artist about the processes involved.

Here’s an introductory video about printmaking: What is a Print? by MOMA
And here’s a more in-depth video about printmaking:  The Printed Line: An Introduction to Printmaking Techniques

How is a print made?

It takes me about seven steps to make a print once I’ve settled on an image:

Step 1 - Color separation

Wedding Party by Heather Page is an 11.25" by 15" aquatint on paper of trees in a forest in brown, green, and yellow
Wedding Party

Most of my prints are in color.

To create a multi-color print, I can put all of the colors on one plate like I did with Wedding Party, but that takes a really long time to ink each print.

Daily Dose by Heather Page, an 18" by 24" silkscreen print on vellum of intertwining calligraphic lines, drips, and wood grain in purple, green, and pink.
Daily Dose

One way to separate colors is to give every color its own plate, like I did with Daily Dose.

The advantage to this method is that it’s easy to separate the colors and each color prints just like I planned. The disadvantage is the number of plates I have to prepare and print. Daily Dose is made up of eleven colors, which means that I printed on each piece of vellum eleven times.

Detail of Queen's Lace IX by Heather Page, a 15 inch square relief print of a swirl of intricate lace-like lichens & fossils in maroon, blue, & yellow
Detail, Queen's Lace

The method I usually use is optical mixing, which is the overlapping of transparent colors to make new colors.

In Queen’s Lace, I overlapped the prints from three plates to make seven colors. In this particular print, the base colors are yellow, magenta, and cyan.  You can see the plates and prints below in Step 4.

CMYK printing uses just four colors–cyan, magenta, yellow, and black– to create every color imaginable. That’s how reproductions are made as well as a lot of original prints.

Step 2 - Make a key block
Cherry keyblock wood relief block for Queen’s Lace / Women's Work by Heather Page, a 15" square relief print of intricate looping lacework of lichens & fossils
Queen's Lace Keyblock

Once I’ve figured out how I want to separate my colors, I make a key block. This is usually the plate that gets printed last in the darkest color and has the most detail on it.

I work on this block first because the key block image also tends to hit all the important areas of the print, so it will act as a guide for figuring out where the other colors should go.

Step 3 - Proof
Proof of keyblock wood relief block for Queen’s Lace / Women's Work by Heather Page, a 15" square relief print of intricate looping lacework of lichens & fossils
Proof of Queen's Lace Keyblock

When I’m done making the key block, I’ll print it to see what it looks like. This is called a working proof.

I’ll make some adjustments, print the plate again, and when I like what I have, I’ll print a proof onto my other plates using a registration method to make sure the images are all in the same place on each plate.

Step 4 - Make the color plates

Now I go back to the color separation sketch I made when I first started so that I can see where each color goes.

Using the key block print as a guide, I make a plate for each color like you see below. You can still see parts of the key block guide on the middle and bottom plates.

Step 5 - Color trial proof

Now I get to explore color and print materials by making some proofs on the papers I’m thinking of using in the final edition. These prints are called Color Trial Proofs (CTP’s).

Sometimes I know exactly which colors I want to print and only need to tweak the color temperature a little bit (lemon yellow vs sun yellow).

Sometimes I try printing the colors I used in my sketch and they look awful, so I have to do more proofs.

And sometimes I get carried away with color exploration and the CTP’s become monoprints, because they aren’t heading toward an edition and they are all different, as you can see below.

Step 6 - Edition

Once I’ve settled on a proof that I like, I can begin editioning. An edition is a group of identical or nearly identical prints pulled from the same plates printed in the same sequence.

There are standard editions, varied editions, and split editions, all of which can be limited (numbered) or unlimited. Check out the editions section below for more information on the different types of editions.

Making Editions
I print editions in a couple of different ways:

  • By color
    • I edition lithographs, relief prints, and silk screen prints by color, meaning that I print the first color on all of my sheets of printing paper for an edition, then move on to the second color, then the third, etc.
    • Here’s a video of a couple of printers printing the second layer of a lithograph: Making a Lithographic Print at the Tamarind Institute of Lithography
  • By print
    • Intaglio editioning is different. In order to print an intaglio print, I have to soften my printing paper so that it will stretch into the crevices of the printing plate.To soften the paper, I soak it in water and then blot it dry. Softened paper elongates when it goes through the press and then shrinks again when it dries, which can make aligning the images on multiple plates tricky.Therefore I ink all of my intaglio plates first and then print one after the other on one sheet of paper to make a print. I then place the print between boards so that it dries flat and start inking the plates all over again to make the next print.
    • Here’s a video of Mark Lunning of Open Press in Denver printing a two color relief plate with chine collé: Ken Elliott: Printing a two color etching with Chine Collé
Step 7- Curate

Curating a print involves tearing off registration tabs, cleaning up its margins, signing and numbering it.

This is also when I decide which prints will go in the edition, which prints will be marked as proofs, and which are rejects.

Types of Prints

There are all sorts of ways we can make prints, but they generally boil down to four ways to transfer the ink: intaglio, lithography, relief printing, and silkscreens.
Intaglio
Beeline 2 by Heather Page is a 12” square intaglio print & drawing of a purple line zigzagging over seed pod clusters linked by a wave of cerulean blue circles
Beeline

We make intaglio prints from textured plates that we have wiped with ink–meaning that we’ve pushed the ink into the plate’s crevices and wiped its surface clean. Aquatints, collagraphs, drypoints, engravings, etchings, mezzotints, and even relief blocks can be printed in intaglio.

To print the plate, we place it on an etching press and align a piece of softened paper (paper that’s been soaked in water and blotted) on top. We place backing papers and a set of wool blankets on top of the paper and crank the pile through the press. The press pushes the blankets and the softened paper down into the printing plate, transferring the ink and the texture of the plate to the paper, making a mirror image of the plate.

  • Here’s a video of Alfons Bytautas of Edinburgh Printmakers, Scotland demonstrating different types of intaglio platemaking methods as well as how a print is made: Etching at Edinburgh Printmakers
Lithography
Madrid by Heather Page is an 11" by 15" lithograph on paper of juniper bushes in front of a mountain range
Madrid

Lithography is a chemical process that happens on the surface of the stone or plate (the matrix). We use water-repellant materials like greasy crayons to create the image and then treat the rest of the matrix with cellulose gums and acids to make the non-image areas attract water.

To ink a lithograph, we moisten the surface of the stone or plate with a sponge and then roll over it with a greasy ink. The ink sticks to the image, but is repelled from the rest of the matrix.

To make a print, we place the stone or plate on a lithographic press and align a piece of paper to it. We then place backing paper and a plastic sheet called a tympan on top, spread some grease on the tympan to make it slide, and crank the pile through the press. The pressure transfers the ink to the paper, making a physically flat mirror image of the matrix.

Relief Printing
Women's Work by Heather Page is a 15 inch square relief and silkscreen print on pink gingham of an intricate looping lacework of lichens and fossils
Women's Work

Relief printing is printing the surface of an object, so pretty much anything can be a relief plate. We can print objects, flat cut-out shapes, as well as printing plates that we’ve carved, collaged, etched, etc.

To ink a relief plate, we can roll ink over the surface, paint ink on the surface, or push the plate into the ink.

Relief prints don’t tend to need as much pressure as intaglio and lithographic prints to transfer the ink. We can print them by hand, on etching presses, lithographic press, and letterpresses. And we can print them face up or down. When the printing paper is under the block, the print tends to have less texture to it. When the paper is on top of the block, much of the plate’s texture can transfer to the paper, along with the ink.

Silkscreen
Daily Dose by Heather Page, an 18" by 24" silkscreen print on vellum of intertwining calligraphic lines, drips, and wood grain in purple, green, and pink.
Daily Dose

Silkscreens are prints made with a stencil adhered to a mesh screen. The mesh allows us to use more intricate designs as it holds delicate stencils together. Stencils can be cut out of paper and then stuck to a screen, hand-drawn or painted directly on a screen, or exposed on a screen using a photosensitive emulsion.

To print a silk screen, we usually start by fastening it to a printing table. Sometimes we use hinges and sometimes the screen fits into brackets on the table. We lift the screen and align our printing paper (or fabric, etc.) face-up underneath it. We also coat the screen with ink using a squeegee while the screen is up. This is called flooding the screen. We then lower the screen onto the paper and squeegee ink through the mesh with a little force. The ink squeezes through any part of the mesh that’s left uncovered, transferring a flat image onto the paper that faces the same way as the screen.

  • Here’s a video of Jimmy Nguyen making a silk screen at Supergraphic Studio in Durham, North Carolina: Screen Printing Basics
Monoprints
La Lueur by Heather Page, a 6.25 inch square abstract silkscreen and relief monoprint in reds, purples, & golds with a border of lacy white cloud shapes
Atmospheric Scintillations

Monotypes and monoprints are unique prints. We can make them using just one or a combination of the techniques mentioned above.

We make monoprints when we include a printing plate or screen in a work of art. Monoprints can be prints that we draw on, thus making them unique. They can be created mostly through monotyping or mostly with printing plates.

Atmospheric Scintillations, for example, began as a silk screen print which I then covered with myriad layers of relief printing using about thirty different laser-engraved plates. I then collaged silk-screened images of lichens on top.

Monotypes
XII / Twelve by Heather Page is an 11 5/8” x 11” monotype on paper of a speckled purple wash overlaying leaves in yellows & oranges, capped in a section in gold
XII / twelve

We make monotypes by drawing or painting on a surface (usually something non-porous like a blank printing plate or a piece of mylar) and then transferring the artwork to another surface with pressure.

XII/Twelve is a monotype that started as a water soluble crayon drawing of fall leaves on Plexiglas. I printed multiple layers of thin ink washes on top of the transferred drawing and finished the piece with some drawing on top.

Editions and Proofs

Editions

An edition is a group of identical or nearly identical prints pulled from the same plates printed in the same sequence.

One set of printing plates may be used to print more than one kind of edition, which should be noted in the documentation that comes with a print. Likewise, the type and number of proofs made from the plates should be noted on the print documentation. Why is this important? It affects the price of the print. Less prints = a higher price.

Types of Editions
Edition

This is the standard edition which is usually numbered using Arabic numerals, such as 1/25. The number above is the number of the print. The number below is the number of prints in the edition.

As I mentioned above, there might be a second group of prints made from the same plates, usually numbered with roman numerals. Sometimes this denotes a restrike (the edition sold out and they made more). Sometimes this marks a split edition (see below).

Edition variée

Also known as a Varied Edition, this kind of group tends to use Arabic numerals followed by e.v. or v.e., depending on which language the printer likes to use, so it looks like 1/25 e.v.

A varied edition is a group of prints made from all of the same printing plates in the same order with slight variations. Variations may be in color…or maybe the artist tweaked a plate a little while printing…or there are bits of chine collé thrown in, etc.

Beeline is a varied edition. Even in these thumbnails, you can see the range in inking.

Split edition

A split edition is two edition groupings with some major change between one group and the other. One set is usually numbered in Arabic numerals (1/25), the other in Roman (I/XXV).

Sometimes the artist likes two different palettes for the print and editions both. Other times, the artist likes two different papers so much that she editions both. Me, I push it a bit and tend to do both, plus add a print layer.

Lichens is a split edition. I created a standard edition of prints–1/8-8/8–for a print portfolio. I created the second edition, I/XXV-XXV/XXV e.v, in order to explore the image more. I varied the range of tones in the inks and also used a variety of papers–some handmade, some already printed.

Monoprint

Monoprints and monotypes are unique prints, so their edition numbers are always 1/1. However, both processes can make more than one print, the primary print and then subsequent ghost prints (anything printed from the plate after the first print). So you can often find groupings of monoprints and monotypes that are based on a shared plate, a shared theme, etc.

My Atmospheric Scintillations series all started from the same silkscreen image, and share the same set of relief plates as well as the same palette.

Proofs
Proofs are prints outside of the edition. Sometimes they look like the edition, sometimes not. It depends on the proof.
Types of Proofs
Working Proof A Working Proof, marked as #/# WP, is a print that the artist draws on in order to resolve the image.
Trial Proof A Trial Proof, marked as #/# TP, is a test print.
Color Trial Proof A Color Trial Proof, marked as #/# CTP, is a series of prints made to try out different color temperatures and combinations
State Proof 
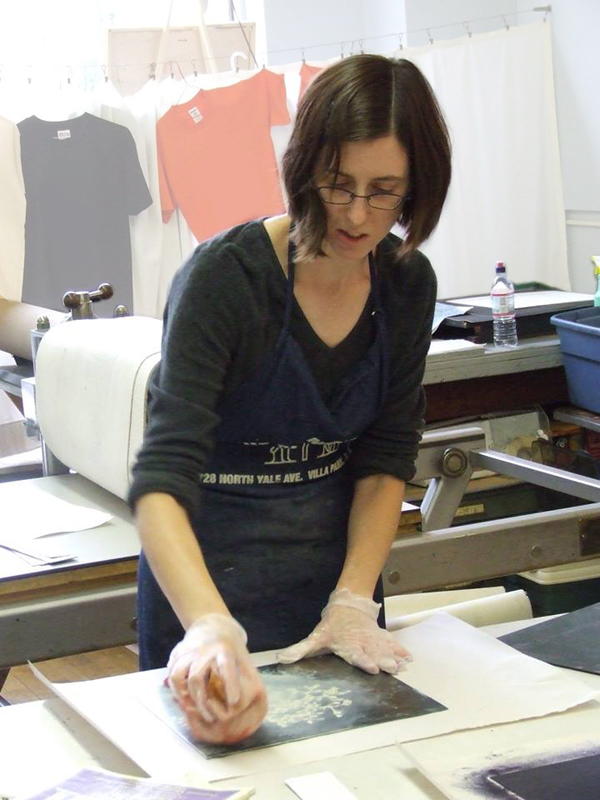
A State Proof, marked as #/# 1st state (#/# 1er état in French), is a group of prints pulled from the printing plates before they are completed. You’ll see these marks on etchings quite often because the artist can easily ink and print the plate to check her progress. There’s no limit to the number of states one can print.
Bon à Tirer A Bon à Tirer (a.k.a. BAT or Good to Pull), marked as BAT or GTP, is the standard for the edition. When I print for other artists, the BAT is our contract acknowledging that the edition should look like this print and may have some notes on the back.
Artist’s Proof An Artist’s Proof, marked as #/# AP, is a print that is set aside for the artist. This practice makes more sense when the artist is working with a publisher and a printer. In such cases, the artist usually gets paid an artist’s fee up front and maybe a percent of the edition sales. Setting aside some prints as artist proofs is a way to give the artist some of the prints of her artwork without cutting into the edition.
Printer’s Proof A Publication Proof (Hors de Commerce in French), marked as #/# HC, is a print that looks like the edition that is set aside to show to prospective buyers. These prints tend to get ruined by repeated touching and traveling and are meant to be destroyed once the edition is sold out.
___ Proof We also make up names for proofs when we are required to set aside prints for donors, community printshops, assistants, etc.